

How To Make Drawings More Realistic
Beginners Guide: Realistic Pencil Drawing
Updated: xiii February 2022
Pencil drawing is monochromatic. It has a single hue (greyness), just with different brightness values (from very light gray, to very dark gray).
To go realistic results when drawing with pencils, start by cartoon the form accurately. And then, brightness values are the cardinal. Meaning, how nighttime or light each area is. In addition, pay attention to edges and transitions.
While in that location are many factors when it comes to drawing realism, here I focus on the almost of import ones.
The 4 key factors for realistic pencil cartoon are:
- Precision Drawing
- Brightness Values
- Edges
- Transitions
Note:
At the end of this tutorial, you will observe some practical drawing tips.
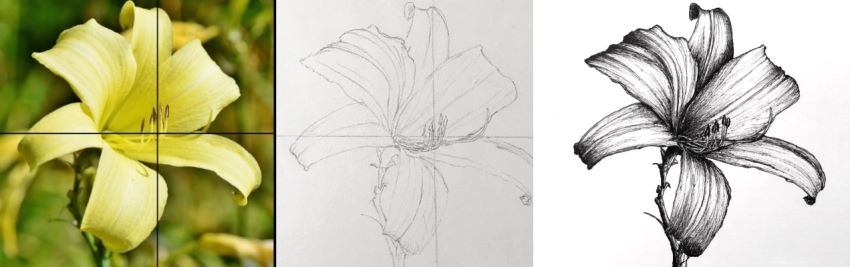
Precision Cartoon
Each object or figure has distinct characteristics and a unique form. Therefore, in club to produce a realistic result, the craft of drawing must be precise.
To draw in an accurate way, you need to understand what you are looking at, and to describe what you see, and Not what you know.
Foreshortening:
When drawing in perspective (a set of guidelines for drawing in a realistic way), objects are subject to foreshortening.
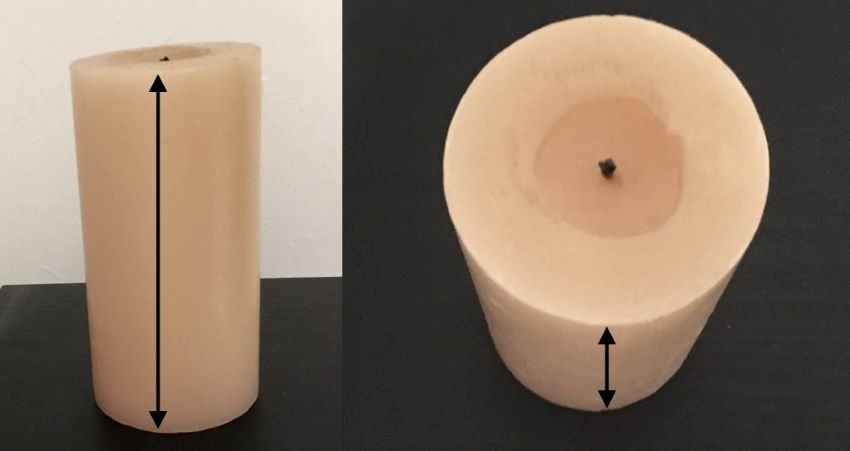
In the following example, you know that the top part of a candle is circular (circle), but when you draw what yous see (when drawing a side view), the summit part of the candle is actually elliptical:
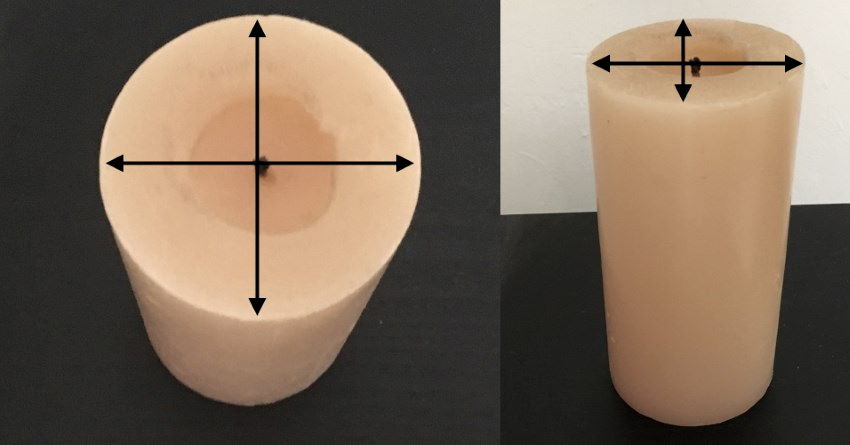
Opposite phenomenon occurs when looking from above. The candle's long cylindrical body becomes shorter due to foreshortening:
Caption:
In perspective, objects that are in front of the observer look smaller as they are farther away.
Because they are in front of the observer, they continue the ratio between width and elevation, meaning in that location is no distortion, the object looks the aforementioned only smaller.
On the other hand, objects or surfaces forth the line of sight are distorted (meaning, foreshortened).
The reason is the observer angle of sight. The more a surface is in the direction of your sight, the shorter it is.
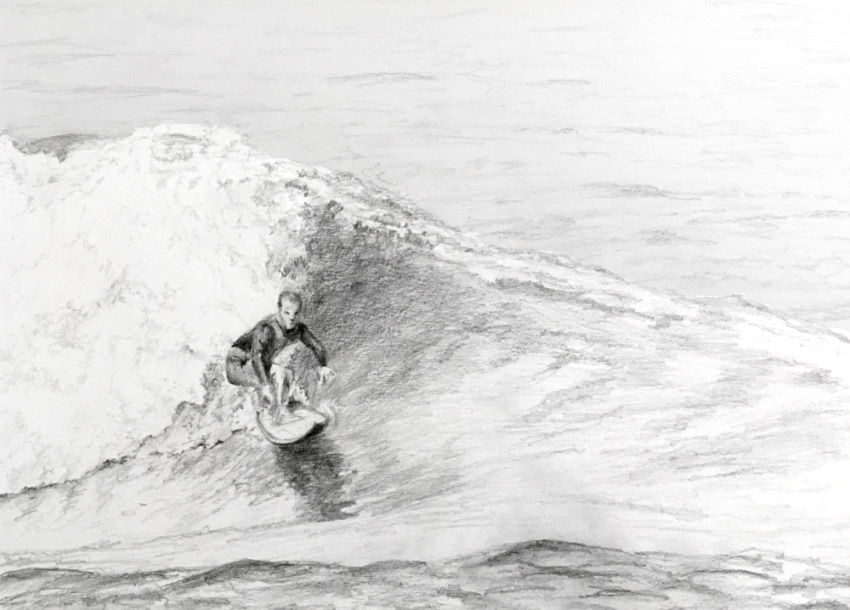
In the next example, run across how the surfboard is foreshortened when facing you.
To get a deeper understanding on foreshortening, read my guide on how to draw objects from imagination.
How to describe accurately:
Drawing is done in a ii-dimensional way, on a flat paper. Disregard the third dimension, which is depth, and look at objects in a 2d way: width, height and angles.
Apply your pencil to meet the angle of whatever line you choose to describe.
Remember:
Your cartoon newspaper is flat, so when measuring angles, turn the pencil left or correct only! Never forward or backward.
Do the same for complex drawings, like portraits.
In the next case, I paid attending to the angle of the eyes.

If you struggle drawing accurately, read my guide on how to draw accurately from observation.
Tip:
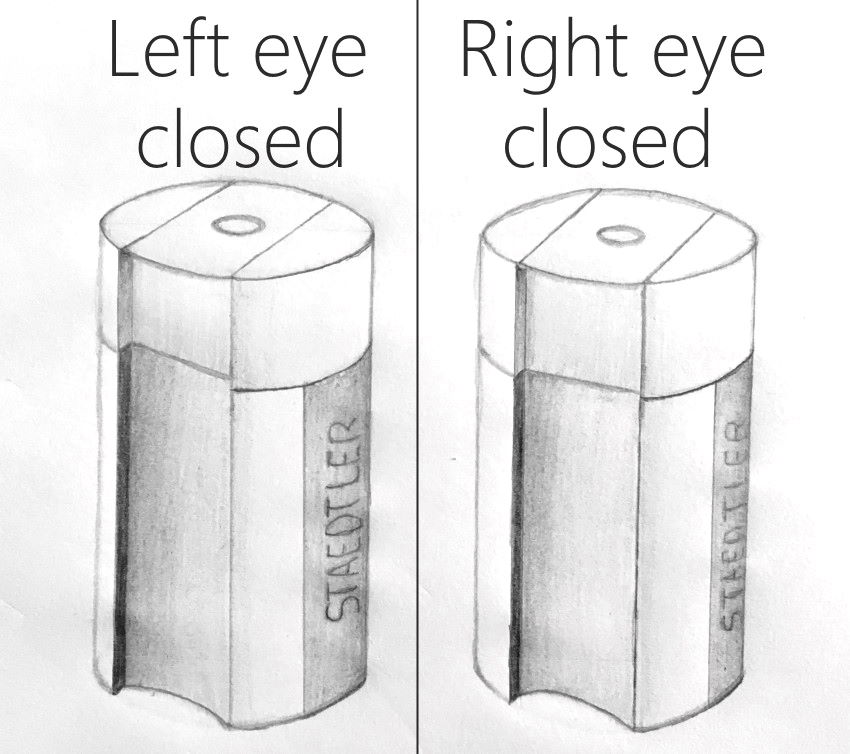
When 2 people look at an object from a different angle, they describe it differently.
The same happens with your optics. Each middle looks at an object from a unlike bending.
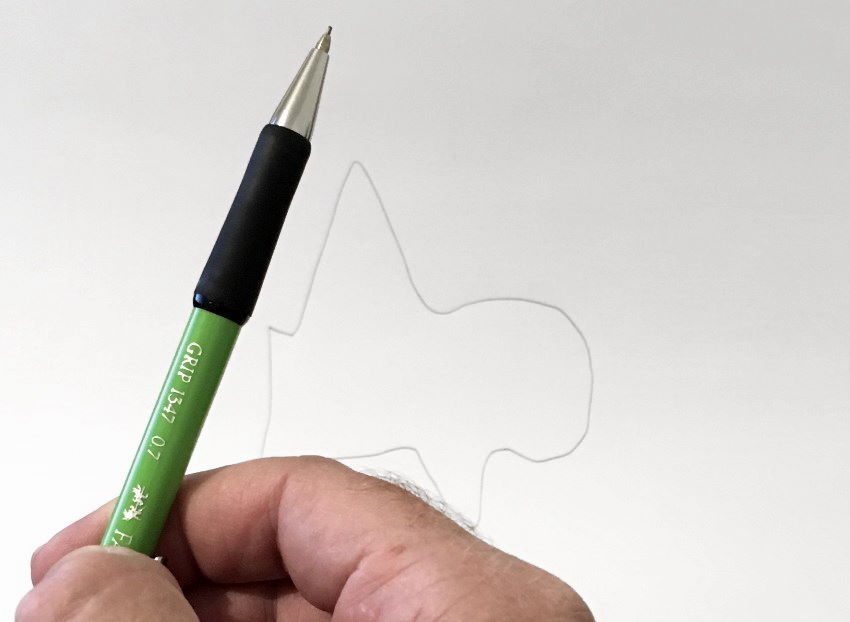
To draw accurately, close one eye when y'all are using a pencil to measure dimensions and angles.
Await at some coloring pages on your screen, and try to reproduce them.
Cartoon the form (structure) accurately is the most important part of realistic cartoon.
Remember:
Learning to draw accurately from ascertainment is crucial for cartoon realism.
After you lot chief cartoon anything in proportion, you tin bargain with the other factors of drawing realism.
Understanding effulgence values is essential, and I will cover information technology next.
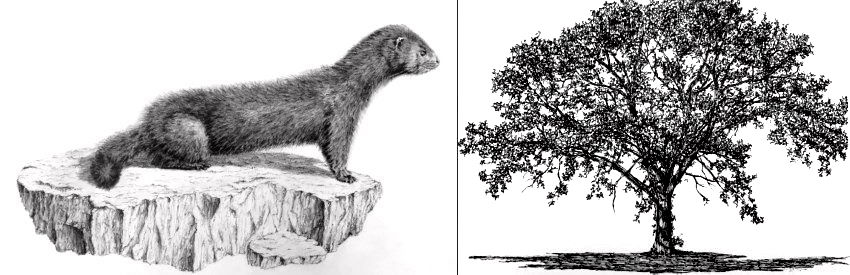
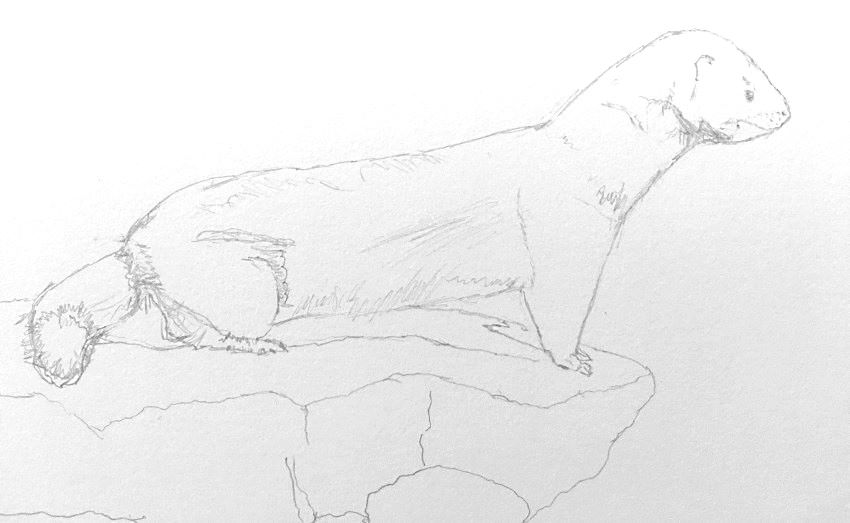
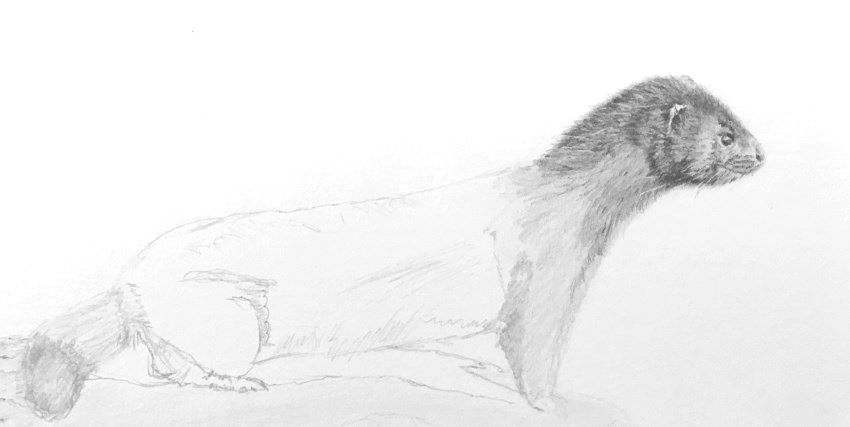
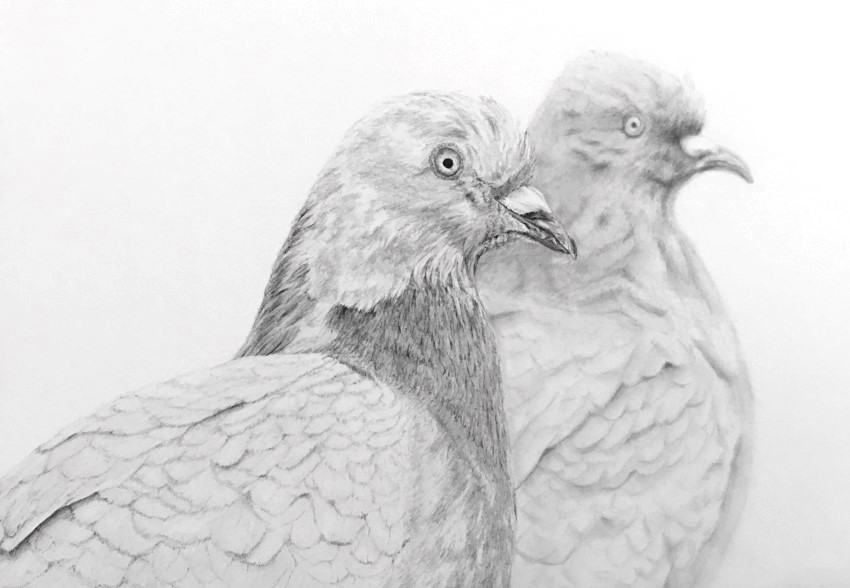
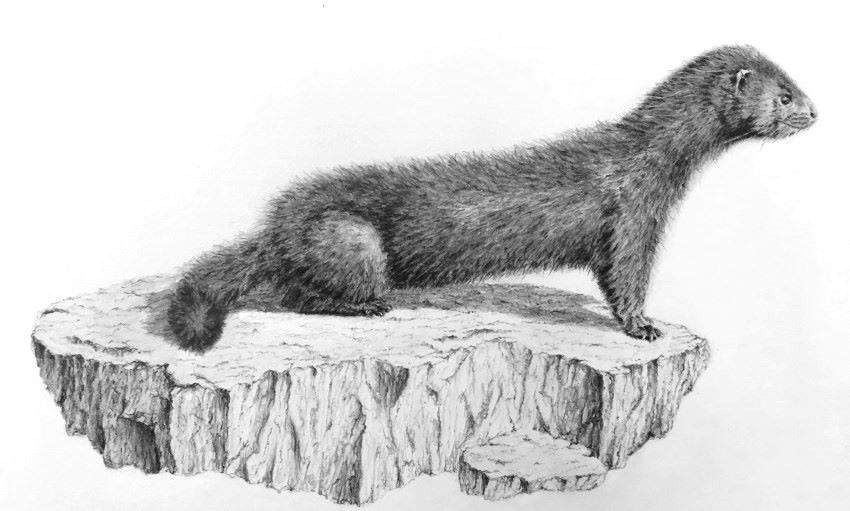 Realistic pencil cartoon of a mink
Effulgence Values
What are effulgence values?
Brightness values or values are how light or dark any area of the drawing is.
Brightness values play a crucial role in creating the illusion of depth and three-dimensional forms on a 2-dimensional surface.
What is pencil drawing?
Pencil cartoon, at its most basic class, is putting graphite particles on newspaper.
To do that, we employ pencils.
Pencils come in different hardness levels. Difficult pencils only put a little corporeality of graphite particles on a paper, resulting in a lighter/brighter value (H levels for hardness).

On the other hand, soft pencils put a big corporeality of graphite on a paper, which results in a darker value (B levels for blackness).
How to use a pencil?
For any type of pencil, the amount of pressure applied while drawing determines the effulgence value. More force per unit area creates a darker value, and less pressure creates a lighter value.
I recommend using a number of cartoon pencils with dissimilar darkness levels for different brightness values.
Sharp pencils are suitable for pocket-sized details. For smooth transitions, sometimes it is useful to employ non-sharp pencils.
For a list of materials that I use for cartoon, visit my essential pencil-cartoon supply review.
How to practise?
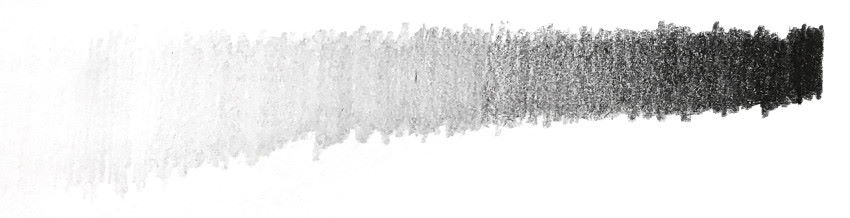
Know your tools! Practice on creating gradual transitions in brightness values for each pencil form y'all use.
That volition help you lot make up one's mind how much pressure to use for each dissimilar effulgence value, and how dark or light you tin can go with each pencil grade:

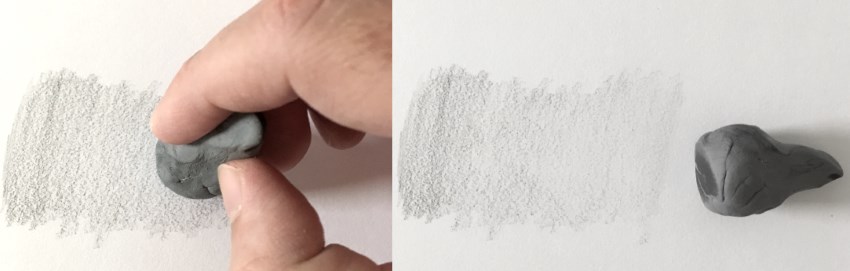
You lot tin change effulgence values by using a kneaded eraser.
By gently borer on a drawing surface, the kneaded eraser will collect graphite particles, and therefore result in a lighter value.
How to decide brightness values?
Observation is the fundamental to identifying the brightness values of any object or image.
Examine each part of the cartoon, to encounter if it is darker or lighter than the object you lot are trying to describe, and and then correct it accordingly.
In addition, it is important to pay attention to the range and variety betwixt the darkest areas and the brightest:
- If the range or deviation between dark and light areas is pocket-sized, the cartoon may announced flat.
- When the range betwixt dark and brilliant areas is big, the drawing is noticeable, and has volume and depth.
In other words, there should exist enough contrast between dark and bright parts of the drawing in order for information technology to look rich and intense.
Tip:
Sometimes when looking at a complex object, specially with colors (or texture), it is hard to encounter how nighttime or light each area is.
To solve this trouble, squint while observing, in order to lose focus.
When both optics are partly airtight, you lot can focus on brightness values, and disregard other distractions.
Exercise:
Endeavour drawing your hand. Kickoff by marking the drawing paper, so yous can e'er put your paw back at the same place.
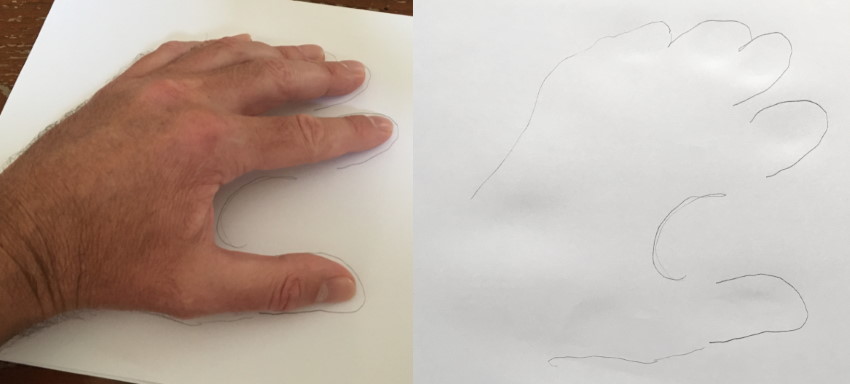
Unless y'all are using a tabular array lamp, difference in brightness values are subtle, and therefore it is a great practice to master values.
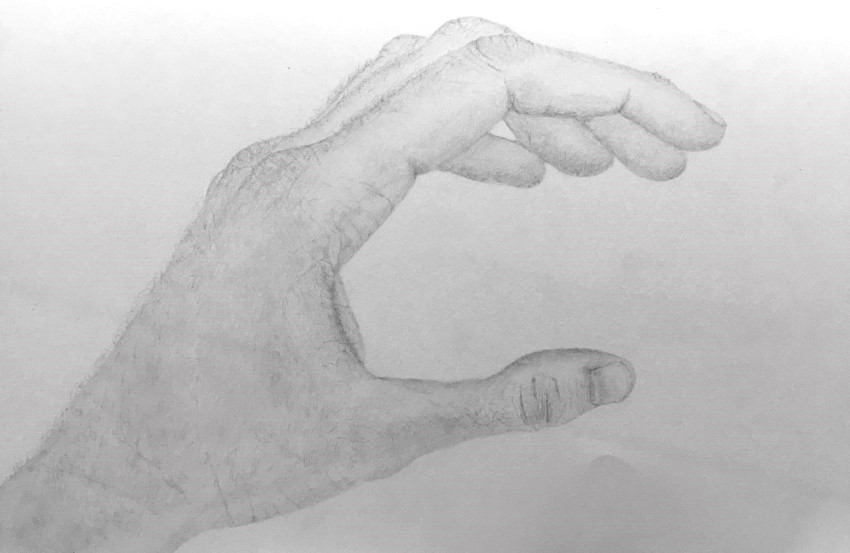
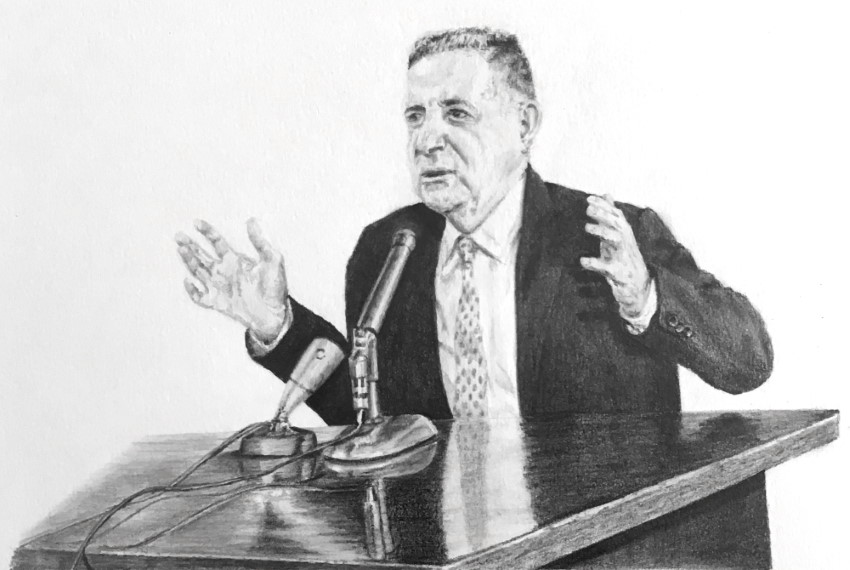
Arguably, the hardest form of drawing is portraiture.
Information technology is critical to be authentic both in drawing the form AND in brightness values.
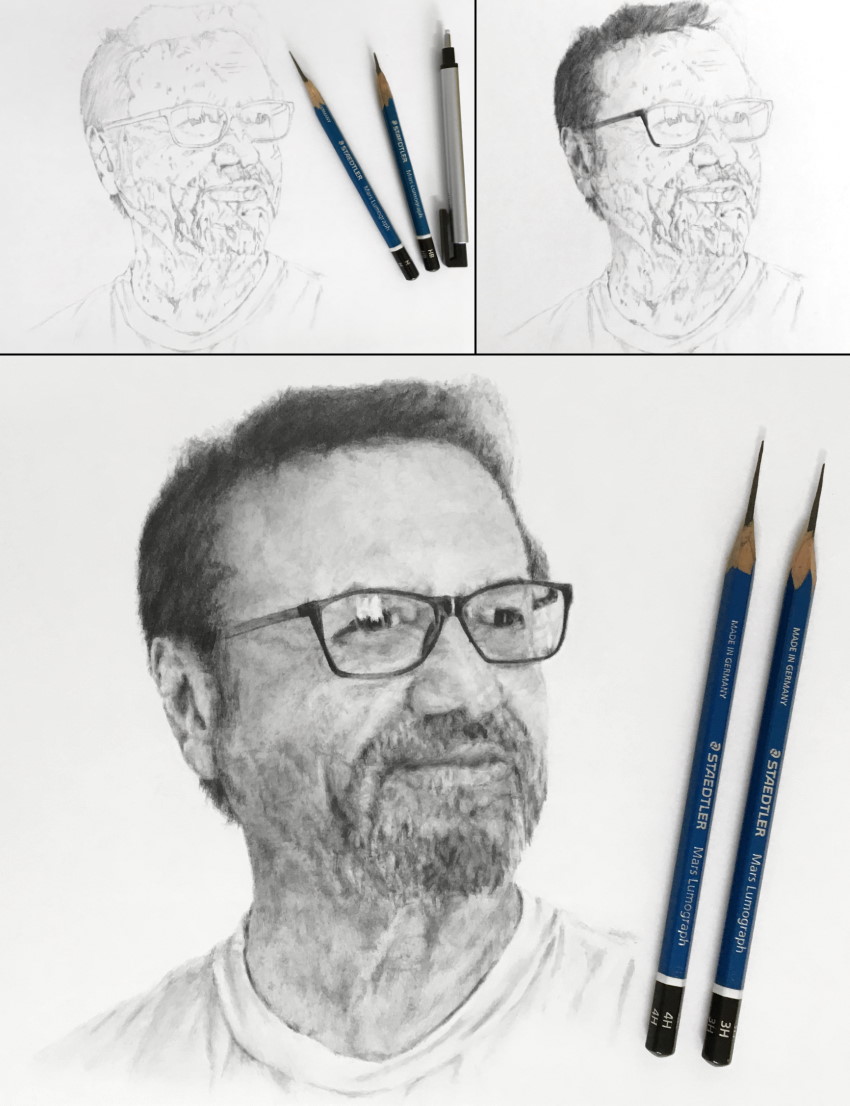
 Portrait pencil drawing, Alin
Edges
Every bit opposed to comics drawing that is characterized by contour lines, which environment the effigy, in realistic drawing with a pencil (or in whatsoever other manner), there are no lines at all.
The edge of an object is where its shape or surface ends. Information technology can end in a sharp fashion, or in a soft way, but it is non a line!
Some objects (like fur, hair, or material) have soft edges, while other objects (similar rocks, cars, or furniture) have hard edges.
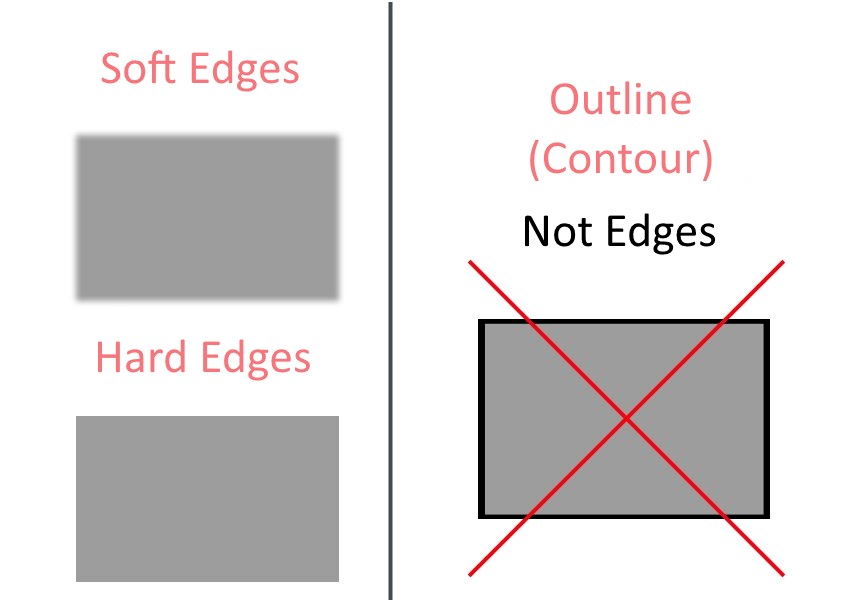 Edges vs outlines
To draw a soft edge is to create a gradual transition (gradient) in effulgence values, from dark to light.
Depending on climate conditions and distance, far away objects might take soft edges.
Remember:
Use lines merely as guidelines to draw an authentic form. Draw them lightly, so they are easy to erase if needed.
How to draw soft edges:
At that place are many ways to draw soft edges (slope from dark to lite), depending on the effect yous would like to achieve.
Hereby, three recommended means:
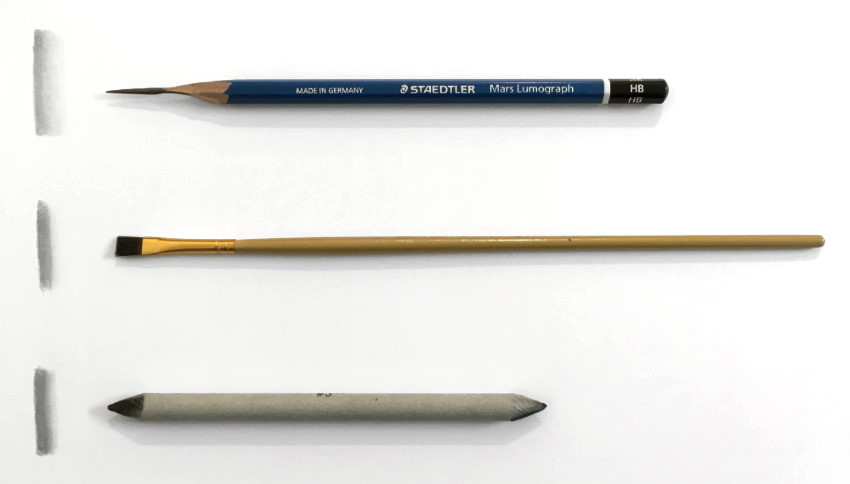 Methods to draw soft edges
If you lot are not effectually your drawing equipment, you can always use a dry paper (similar paper towel) or cloth to smooth edges.
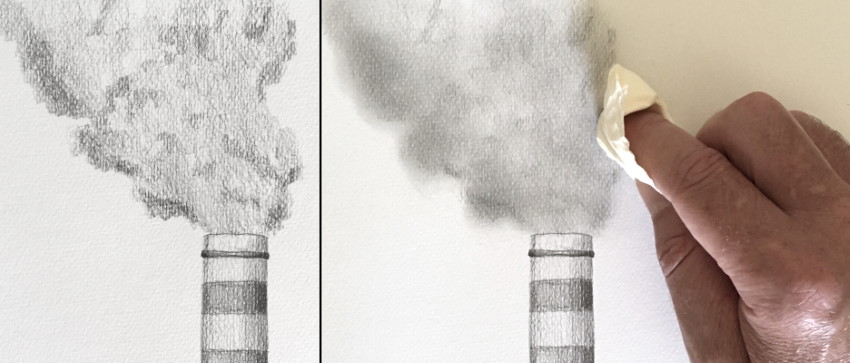 Soft edges with toilet paper
Note:
Try to avoid smudging a pencil drawing using your finger. It can transfer body oils or sweat to the newspaper sail.
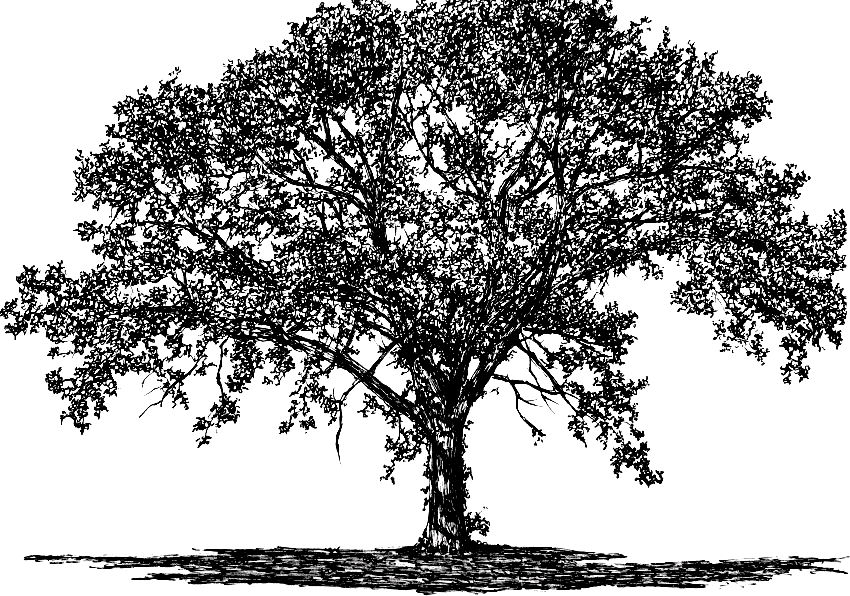
Using soft edges for far abroad objects creates a sense of depth.
Pencil cartoon example:
 Soft edges for far object to add depth
Shadows and reflections:
In many cases, shadows and reflections have soft (or less defined) edges.
 Less defined edges for reflections
Transitions
When cartoon with a pencil, it is important to pay attention to brightness values (how night or light each area is) and edges (how each area or surface ends, either with a soft border or a difficult edge).
In improver, pay attending to transitions.
On a sure surface, areas that are closer to a light source are lighter, and areas farther abroad from the light source are darker, meaning the surface has a gradual transition in values.
Therefore, wait for the effulgence values of a detail surface compared to other surfaces, but also the transitions of values within the surface itself.
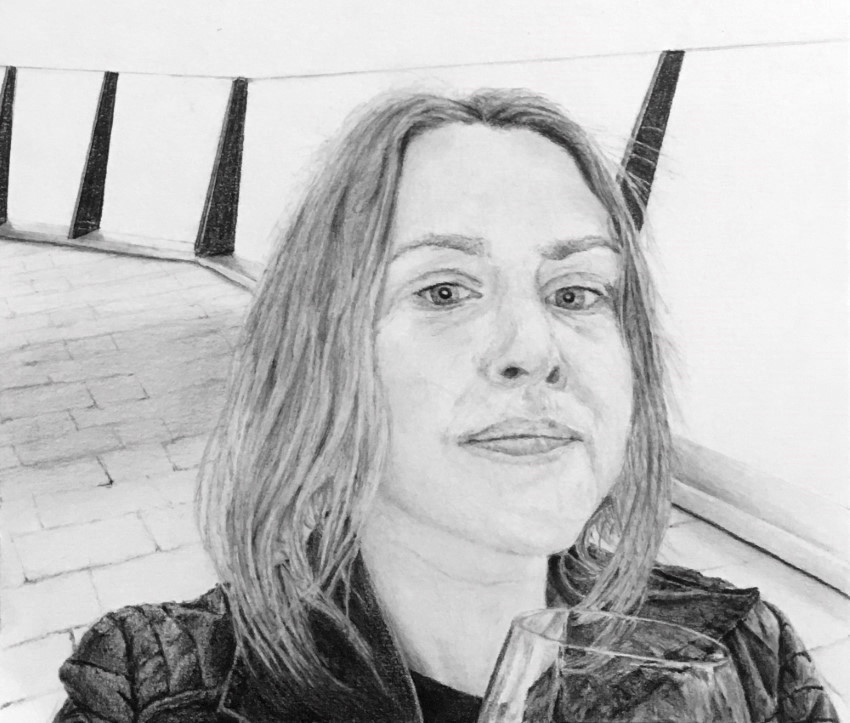
Pencil drawing instance:
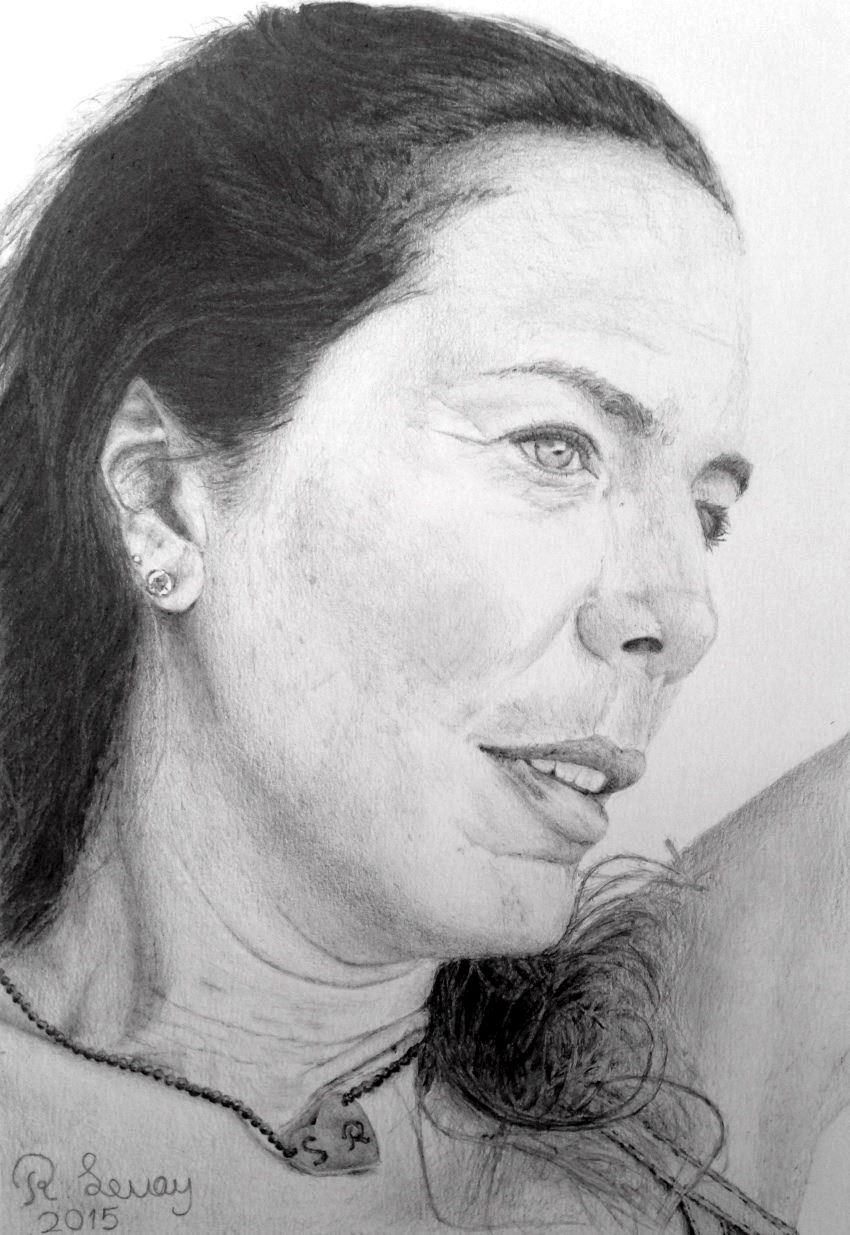 Portrait pencil drawing, Sharon
In the side by side example, I used transitions in brightness values to depict the folds in the cervix area.
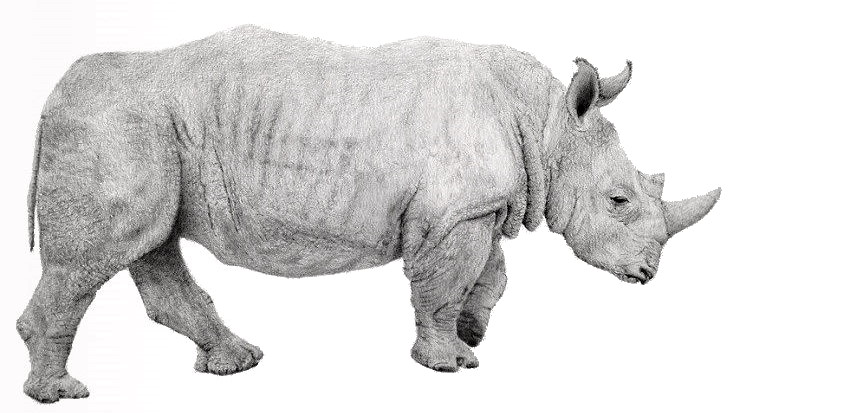 Rhinoceros pencil drawing
Remember:
Every part of each drawing has transitions. An surface area with no transitions looks flat and unnatural.
Drawing Tips
Where to start cartoon?
If you are right-handed, start drawing from the upper left part of a paper sheet, and gradually move to the lower correct.
For left-handed artists, start at the upper right office of the paper.
In this way, the palm can rest on the blank surface of the drawing-paper, and not smear what has already been drawn.
 Drawing from left to correct
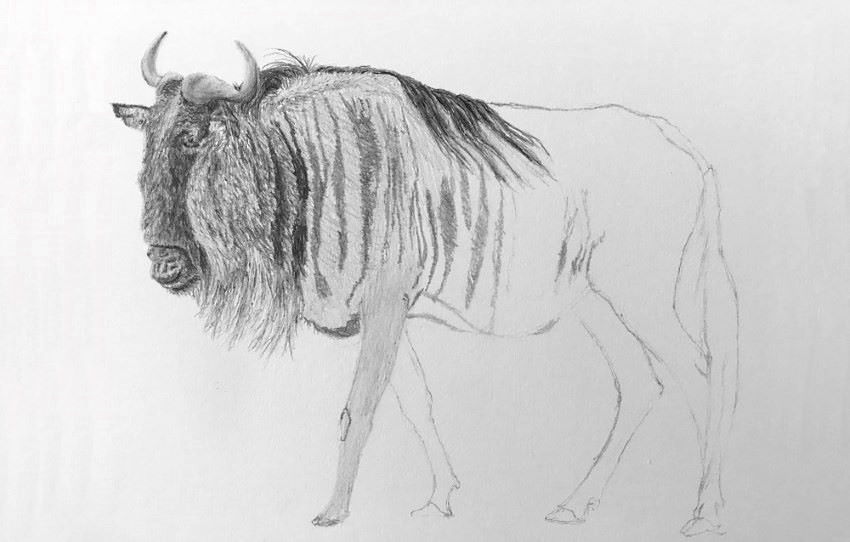
Where to put the light source?
If you are correct-handed, identify the lighting (table lamp) on the left side, so that the palm will not block the source of light, and you can see little details while drawing.
If you are left-handed, place the lighting on the right side.
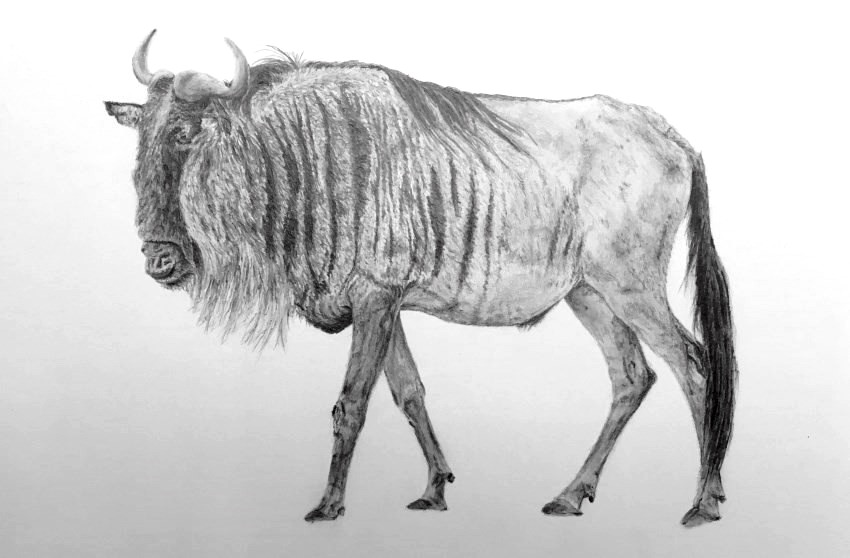 Wildebeest pencil drawing
How to hold a pencil?
By using the thumb, y'all tin motion the pencil body upward, and use it as a measuring device (to see angles).
When releasing the pollex, the pencil is back in place for drawing:
How to avoid smearing?
In club to avoid smearing the drawing or transfer trunk oils or sweat to a drawing paper, you can place a bare sail of paper nether the drawing hand, so that the palm is non placed on the cartoon-paper.
Another option is to utilize a transparent paper sheet under the drawing hand, that mode you tin can avoid smearing, and still see your cartoon.
How to use your cartoon equipment?
Try not to printing difficult when drawing, and so you do not damage the paper sheet y'all are drawing on.
Draw as if you are using a paintbrush, softly and gently. You will get smooth results, and you practise not need to use smoothing tools.
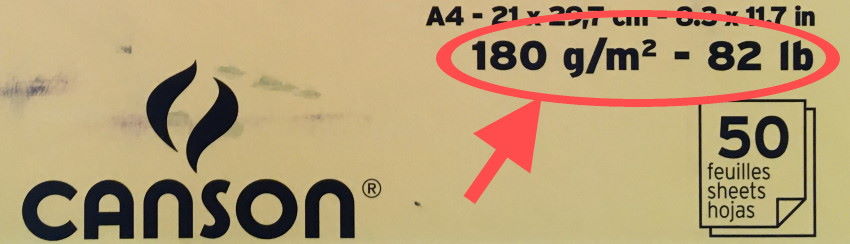
Use thick newspaper for your artworks, it is more durable. Thin paper sheets are great for practice.
I prefer paper with at least 150 chiliad/g thickness, ideally 180 m/m or more:
Do not lean difficult on paper (with any hand) when drawing, to avoid dents.
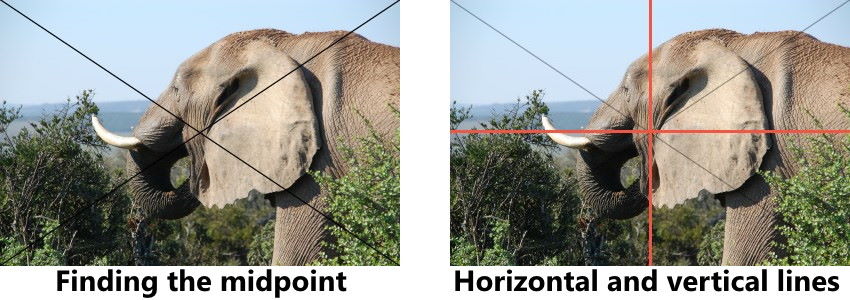
How to employ a filigree?
The center of a reference prototype is the point where the two diagonals meet.
Afterward finding the midpoint, draw a horizontal line and a vertical line in social club to carve up the image into four rectangles.
If an image is large and complex, you can divide each rectangle repeatedly to have more filigree lines.
The next step is creating a filigree on your drawing paper, which is the same process of finding the midpoint and creating vertical and horizontal lines.
Remember that the ratio between the width and superlative of your cartoon paper should be exactly similar the reference paradigm. Y'all tin always crop the reference image to fit the ratio of the drawing paper.
Now it is possible to draw within each rectangle separately. Consequently, the drawing procedure becomes easier and more precise.
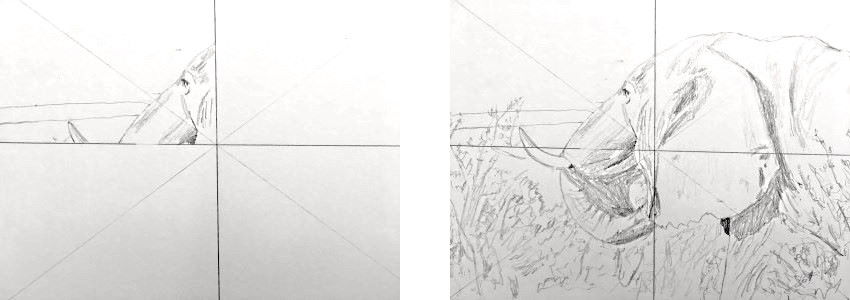
When cartoon filigree lines, do it gently, then you can erase them later!
While I rarely use filigree lines when drawing, for committee drawings, peculiarly with limited time, I use grid lines for efficiency and speed.
Committee cartoon process:
I kickoff by cartoon the grade accurately.
And so I pay attending to the other 3 factors (brightness values, edges & transitions).
I am correct-handed, so I draw from left to right and from peak to bottom:
For more than tips, check out my fine fine art painters gallery for exclusive painting tips by professional person painters.
Which newspaper size to use?
Realistic drawing is fourth dimension-consuming.
A drawing of an animal or a portrait, on an A4 paper sheet, can concluding 15-forty hours.
Therefore, I practise not recommend drawing on a large paper sheet.
Depending on the projection, I use these paper sizes: A5 (small), A4 (medium) and A3 (large).
How to depict direct borders?
When using just role of a paper for drawing, it is useful to border information technology with masking record.

When the drawing is ready, remove the masking tape, and y'all will have a direct border.
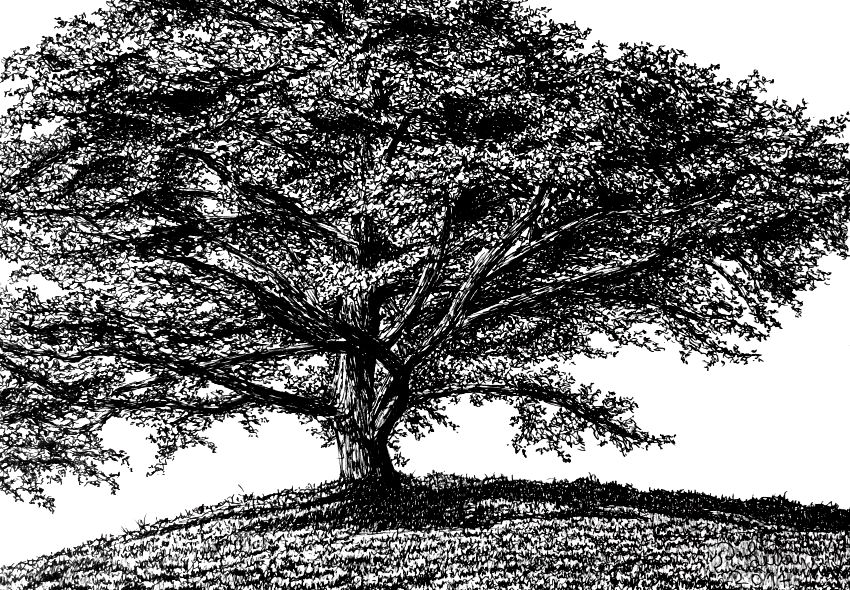
Pen Drawing
While in that location are no lines in nature or in realistic pencil cartoon, pen cartoon is characterized past drawing lines.
 Drawing using lines
I use a technical pen (fineliner) for drawing.
For recommended pen brands to use, visit my review on cartoon pens for artists.
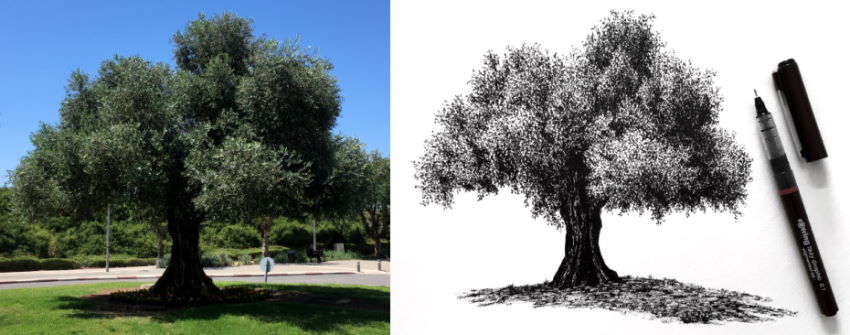
A pen has a fixed brightness value!
The way to create the illusion of unlike effulgence values when drawing with a pen, is to create more than lines in the same area for a darker value, and fewer lines for a lighter value.
 Effulgence values using lines
If y'all like cartoon with pens, you might like my guide for blossom drawing.
And, my guide for drawing trees.
Summary
Since all materials are made of molecules, they tin can never be ane hundred percent shine.
Lite travels as a wave; therefore, shadows are not completely sharp.
For these reasons, there are no lines in nature!
When drawing with pencils, information technology is all about transitions in brightness values and different types of edges.
That said, in fine art, it is possible to create realistic looking drawings, using only lines, past creating the illusion of transitions, effulgence values and edges.
For an in-depth article most drawing and painting realism, visit The 8 Key Factors for Painting Realism.
To understand and add together depth when drawing, visit my guide for creating the illusion of depth in art, it includes 15 means to describe depth, with many examples!
While information technology is convenient to draw from images, I recommend practicing drawing from directly observation. Read my nevertheless life composition-cartoon tutorial to run into how to plan your composition.
![]()
![]()
Copyright © RanArtBlog.com. All Rights Reserved. | Sitemap

Source: https://ranartblog.com/blogarticle03.html
Posted by: goddardpaptur.blogspot.com
0 Response to "How To Make Drawings More Realistic"
Post a Comment